Building Reports
After adding new report to the project
The first thing we need to do is get data into our report. At the top of the
Data
tab choose
<new dataset…> from the dropdown list:
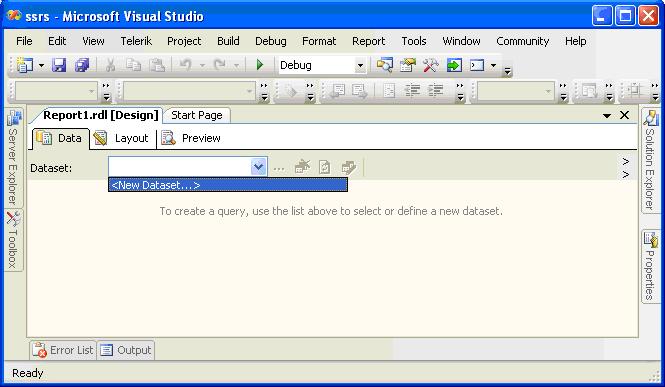
It will opens a new window for adding new data set.
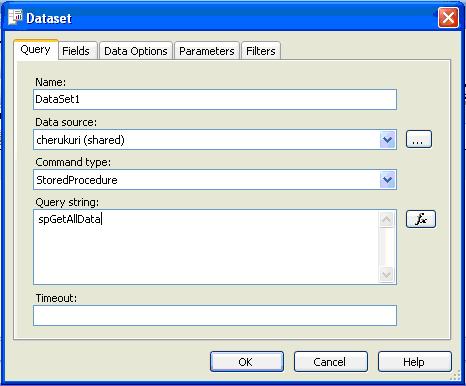
Name the dataset "DataSet1", and select the data source from the dropdown. Select
StoredProcedure as the command type, and enter Stored Procedure Name in the query
string box. Click
OK to close the dialog. Test the dataset by clicking on the big
red exclamation point at the top of the report designer. This executes the query
and displays the results. You can repeat these steps if you wish to add multiple
datasets to your report.
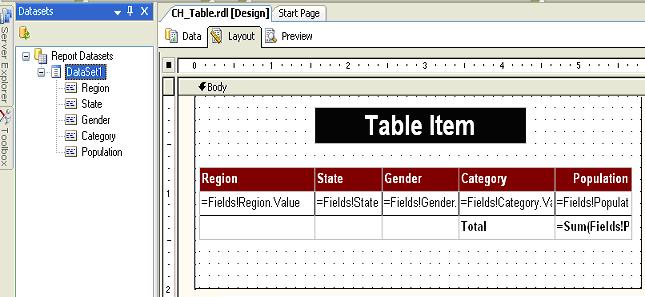
Setting up the report display
Next, switch to the
Layout tab. This is where you actually build the report display.
Start by dragging a table from the Toolbox, onto the Body section of the report.
By default, the table shows a header row at the top, a detail row in the middle
and a footer row at the bottom. You can add additional columns to the table by right-clicking
on one of the columns and selecting one of the two
Insert Column options.
Click on the
Datasets tab under Toolbox on the left-hand side of the Visual Studio environment.
You should see the
DataSet1 dataset. Expand it, select
Region and drag it to the
first cell of the body row of the table. This will display the Region field in the
first column. Now put the
State in the second column, and the
Gender
in the third
and so on:
Note that, when you drag the column like
FirstName into the body row of the table,
SSRS make a guess as to what to call the row. It calls it "First Name". You can
click on the
Preview tab to view the report.